KNOWLEDGE CENTRE
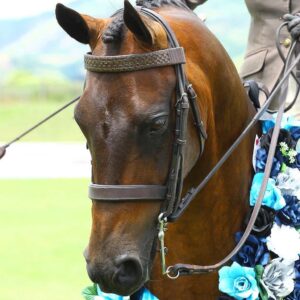 Horse makeup... who would have thought years ago? The why, when, and how we will cover in our journal posts, but for those who do make up their glamour ponies, here are some pro tips:
- Practice at home. Practice at home. Practice at home. It sounds simple and is often said, but for good reason. One, your horse will get used to you dabbing, blending, and blotting. You will work out what looks good and what doesn’t. You will discover what products give you the look you want. Step back and take some photos to get a different perspective.
- Less is more! Gone are the days of clown-like, grease-painted, beauty contest horses in the show ring. Makeup should enhance natural features and not look like the horse fell into a paint pot on close inspection.
- Coolgroom Towels & Baby Wipes. A must-have in the tack box for quick cleanups both on the face and body for any makeup mishaps.
- Makeup is usually applied to the very delicate areas around the eyes and muzzle on the face, and sometimes on legs, under the dock, or over the body. It’s REALLY important to patch test anything you put on these sensitive areas – regardless of what the product or advertising says – so you know it’s safe to use on your horse.
- Sponges & Gloves – silicone makeup sponges are great for blending colour makeup; you want one that isn’t too absorbent or you’ll waste a lot of product getting gobbled up by it. Use well-fitting latex gloves to keep hands and fingernails clean when applying makeup. For the horse that dances around when putting makeup on, using your fingers to apply can be easier than sponges.
- Shirts – take a cheap, oversized, long-sleeved button-up shirt with you to every show. We go for an XL MEN'S shirt in the bargain bin at department stores. This will keep you clean and is easy to get off because your horse will be determined to deposit some makeup back on you so you can be matchy-matchy.
- Be Prepared – leave plenty of time to apply makeup before classes and keep it appropriate to the level of the event and your horse's education. If your horse is fussy to bridle, or you have an expensive ribbon browband on, bridle up first then apply makeup.
- The ‘Minimalist’ look. When you don’t want overdone, just a clean-skinned natural look, go for natural oils. They are quickly absorbed into the skin and give that lovely dark, hydrated look. If applying over hairy faces, rub these oils in through the hair well before ring time to give them a chance to absorb and darken up the skin.
- The ‘Classic’ look. Stepped up a couple of notches from natural, a ‘Classic’ makeup for show horses is on trend now and used for both Showhorse & Hunters. It’s a little glossier than minimalist and can include some subtle and well-blended color cover to balance out uneven hair shades. Blending is key if using any color product, and if possible keep as close to natural colors as possible.
- The ‘Diva’ look. As glamorous as it gets, this look is usually reserved for special occasions, indoor & nighttime events, and top competition like HOYs. Patent, glossy eyes and super black skin around the muzzle are the go, clear or colored glossy points & chestnuts, perfectly smooth sanded hooves, and lots of tight trimming of hairs complete the look.
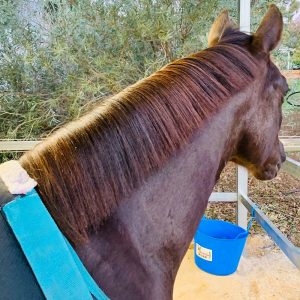 Maintaining manes in winter doesn’t need to be tricky.
There are a combination of a few things you can do to keep your horses manes in good condition over winter:
Only rug the neck during the day if the weather is absolutely revolting.
Taking the neck rug off each day does a couple of things – it allows the hair and skin to breath each day and it means that you’ll check the mane & rug each day so you can tell when they need to be washed.
Good quality thick polar fleece neck rugs with a slippery lining are amazing because they’re light, they’re pretty much waterproof and they’re warm. Plus they’re easy to wash regularly.
Clean rugs are a MUST. Dirty rugs will grip the hair rather than slip over it, meaning that rubbed manes are more likely.
NEVER put more than one layer on the neck (unless it’s the night before an event, they’re plaited and using a skinny hood as well.
Avoid cotton combo rugs where possible. In my experience, combo rugs are notorious for rubbing out manes. They tend to slip down the neck, bunch up and tighten, which causes rubbed manes.
Wash and deep condition the mane every 1-2 weeks or as needed, you can feel when the hair needs to be washed.
The HSE Intensify Conditioning Mask is amazing! Leave it in for 20 mins before rinsing out and your horse’s hair will feel like human hair (and yep, you can use it on your own hair as well!!)!
Also use the HSE Liquid Silk Hair Polish Serum to keep the hair knot free, smooth and slippery which also helps stop it being rubbed out. Use this after washing and then a couple of times a week between washes.
Damage can be done to manes in a day. If all else fails and you do get some rubbing, get onto it as quickly as you can. To be honest the best product to help regrow healthy hair (as long as the hair follicles haven’t been permanently damaged, if that’s the case then nothing will help) is the HSE HG Serum.
 We all want our 4 legged family to have lush, healthy, glossy, flowing manes and tails right? Even if we plait, pull & trim we still need great healthy hair to work with.
Some pro tips for show ready mane & tail care;
- Manes – don’t over rug or over heat the neck. Constant over-heating keeps the follicle active and combined with friction from neck rugs can cause hair fall leaving you with less mane.Good airflow and natural fabrics are they key.
- Mane & Tail – less is more! Shampoo with the likes of our HSE ShowTime Amplify Shampoo only when really needed, not when you want to it feel squeaky clean. Pre-mix your shampoo with water before washing and rinse, rinse, rinse really well! Detergent residue can build up and cause rubbing/itching.
- Keep the mane bed or dock clean and don’t overload with products. Deep condition once weekly rather than applying several products daily. HSE Intensify Hair Mask was designed for this exact purpose. Treat the base of your horses mane or tail as you would your own scalp.
- Brush less… brushing long hairs creates friction, friction equals breakage. Never brush long hairs while wet.
- Use wide toothed combs and brush from the bottom up when detangling.
- Keeping very long hair in braids/plaits can be helpful, but be very aware of safety! Murphy’s (horse) Law says if they can rub or get a plait hung up on a fence they will, this can have catastrophic consequences. If you do braid long hair, keep it loose at the base and slightly tighter from a few inches down. Same applies for tail braiding or bagging.
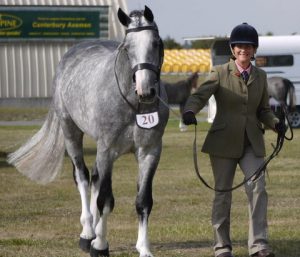 One of our most asked questions is how to get that yellow look out of the mane or tail? Just when you thought it was clean and white, the show photographers camera will pick up all the yellow hues our eyes cant see. HSE HiTone Silver to the rescue! We designed this little concentrate to be so simple and quick to use on the mane & tail or the whole body.
Directions for use: One capful of HiTone Silver in a litre jug of water is all that is needed for gentle toning. Simply soak the hair in the mixture for a minute at a time until the desired result is achieved. Stronger concentrations will give more powerful results.
For best results we recommend a light warm shampoo rinse prior to use to open the hair follicle. Then add 1 cap of HiTone Silver to 1 litre of water and soak for up to 1-5 minutes (depending on how stubborn the stain is). Rinse with water. If there is any staining from the product follow up with a shampoo rinse.
Try these quick fixes for really tough hair yellowing;
For really stubborn brassiness try using hot water to soak the hair in your HTS mix.
Use distilled or drinking water to mix your HTS in if you only have dam/bore water at the barn.Rainwater, dam water and bore water will all contain minerals and metals that can bond to the hair when combined with shampoo that can make toning more difficult.
After shampooing/stain removing, allow the tail to dry completely, and do a HTS soak from dry.This is what we call the shock method, and is really effective for very coarse or porus hair.
Use HSE Liquid Silk Hair Polish & Detangler immediately after treatment and regularly to reduce staining.Liquid Silk will allow the hair to ‘breathe’ (draw needed moisture from the air) while blocking contaminants like clay, manure & urine that can stain tails.
Keep tail wrapped in a breathable tail bag.Free range tail bags can be a safety issue, some can also suffocate the hair.We prefer breathable cotton or cotton blends over high denier synthetics.
- Did you know?? HSE HiTone Silver can also be used as an ‘all over body’ optical brightener. A light rinse over dappled grey really makes the dapples pop! Same for whites and patchy ponies, and it leaves the coat soft and sparkling.
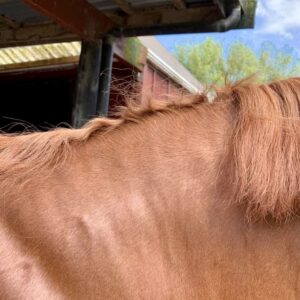 Rubbed manes and tails can be a result of overheating (rugging), high protein diets, insect bites/sensitivity, worms, irritated skin on the dock or mane bed or your horse knows you’ve just paid show entry fees! To get the most out of your HSE HG Serum (or any treatment) to remedy those rubbed out patches, number one priority is ‘remove the cause’. This could include;
- Combo rugs can be a culprit for rubbing mane hair out. Try safe/secure neck rugs, and stick with one rather than multiple. Overheating is a common problem.
- Restricting access to favourite rubbing places in the paddock
- Making sure to keep up regular worming routines particularly for pin worms
- If un-rugged, protecting from insect bites with light breathable fabric rugs
- Check your feed rations are balanced, excess feed ‘heat’ is often felt in hooves and crests.
- Check stable & paddocks thoroughly for irritant or poisonous plants/weeds or any chemical contacts that may be causing itching/rubbing
When treating areas for hair re-growth with HG, shake your bottle really well! HG does contain Organic Coconut oil that can solidify in cooler temps, so it’s important to shake and keep the mix balanced before use. Pump out a couple of drops… just enough to rub into the affected area. If it’s more than what you would use to moisturise your face then it’s too much. Separate the hair (if any!) so you are applying the serum directly to the skin, rub it in like you would a skin cream on yourself. Hair grows from and through the skin so you want to get the serum right into the target area.
HG ingredients not only soothe contact irritations but encourage the follicle to release it’s own natural sebum to flush and coat the skin with protective waxes. During the treatment process, it is good practice to wash the area (only) once a week with diluted shampoo, and if infection is suspected, rinse thoroughly afterwards with an anti-bacterial wash like Chlorhexidine or Betadine. Re-apply HG and continue this process until you have strong healthy hair growth.
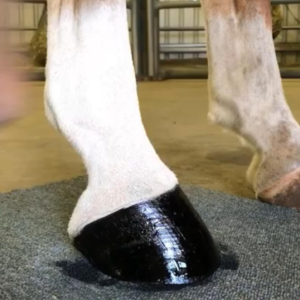
For perfect polished hooves, here are some tips to help you get that smooth glossy look!
- Trim the hair around the coronet band. This is a must if you use hoof black on a white foot, it will stop the black ‘bleeding’ onto and up the white hair.
- Sandpaper blocks. Use a medium & fine grade sandpaper block around the coronet band to smooth the hoof ‘cuticle’ (that waxy scurf around the top of the hoof). Sandpaper blocks are flexible and can also be used to clean up daggy chestnuts on the legs.
- Sand the surface of the hoof lightly to give a smooth, even base to apply hoof black. If showing with natural coloured (white or striped) hooves, give the hoof a good scrub and let it dry first before sanding, this will show you where the stains in grooves are.
- After sanding, rub over the hoof with black or neutral boot polish.
- Toothpaste! Super quick and safe hack for white hooves and feet with shoes on. Use a couple of dollops of white toothpaste with a cloth or toothbrush to get those nail holes and toe clips really clean and white.
- If you have a fidget, try to pre prepare hooves at home when they are relaxed and relatively still. Doing this the night before your event will save time and frustration. If touch ups are needed, try doing this while the horse is on the float, or step them up onto the ramp to touch up on the day.
- Carpet squares are cheap, lightweight and easy to use under the foot for hoof painting.
- Touch-ups! In-between classes and need a perfect finish for a championship call? Steel wool is your best friend here. Plain (un-soaped) steel wool rubbed over the hoof will tidy up any streaks or blemishes, remove dirt without washing, and buff up the remaining hoof gloss ready for a quick re-coat of colour or clear.
- Hairspray – an often used ‘pro hack’ for keeping the hoof gloss from rubbing off. Be aware that hairspray is a solvent, and may well make your hoof black run! Make sure hoof polishes are totally dry before spraying and apply sparingly.
- A la Naturel – for the natives and natural look, use the cleaning methods for white hooves above, for dressing, try HSE Glass Pro Coat Laminator over the hoof rather than waxes or vegetable oils (these can make the dirt cling to hooves) It will stop the dirt sticking and makes an easy wipe over to get ring ready for a perfectly natural look.
- Remember!! If you use hoof black, or resin type glosses, remove them after your show. A little non-acetone nail polish remover will do the trick.
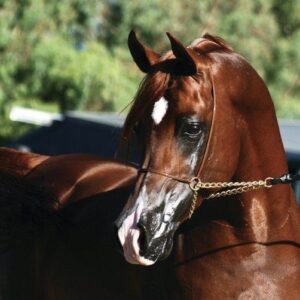 The HSE Hot Oil Coat Conditioner is a fantastic and very versatile product. I have been using it for years and I love it for many reasons. The great thing about it is that is was designed for horses and the ph level of their skin (which is different to human skin which is why products that are designed for humans aren’t always so great for horses). It is a deep conditioning treatment for both the skin and the hair, unlike many other products that are only for the hair. It is made only from natural oils. There are no silicones or chemicals in it either.
There are no set rules for using HSE Hot Oil. Mix it with water at any strength you like depending on how much conditioning the coat needs. Every horse’s hair is different and how it reacts with the oil (by that I mean how much it absorbs etc) is different. The length of the hair will also dictate how much oil you use.
Deep Conditioning Treatment/Straight After Clipping
For this initial application I recommend using 100-250ml of the hot oil depending on the size of your equine. I would use:
- 100-150ml for a pony
- 150-200ml for a galloway
- 200-250ml for a hack
Put it in a bucket with enough warm water (generally 5-6 litres works well) to sponge over the horse from head to tail. When you add the oil to the water it will turn a milky white colour. Sponge or pour the hot oil mixture over them.
Note about the 'HOT'in Hot Oil
I know it’s called “hot oil” but it doesn’t have to be used hot. The most ideal and effective way to use it is with a bucket of warm water. The warm water opens the pores of the skin and hair so the oil is absorbed better. If you don’t have access to a hot water system you can do what I used to do and take a kettle or thermos of hot water to where your horse is.
If this isn’t possible then the next best option is to apply it to a warm horse. So after they have been worked and their skin is nice and warm, then the pores will be open to absorb the oil better.
And finally if you put it in cold water and on a cold horse (as such) it will still work and won’t be a waste, it just doesn’t work ‘quite’ as well, but it will still work.
Top Tip #1
Then use a HSE CoolGroom to remove all the excess water from the coat. This is better than a sweat scraper as the scraper will remove both the water and the oil from the coat, a coolgroom will absorb the water but not all of the oil, leaving your hard earned dollars in the coat where it belongs.
There is no need to rinse the HSE Hot Oil from the coat like you do a conditioner. It is better left in so that it can work it’s magic.
Please note: your horses skin/coat will feel oily after doing this, but THAT IS THE POINT!! But because this product doesn’t contain any silicones it won’t make your saddle slip like other coat sprays.
General Conditioning Treatment
Once you’ve done the initial deep conditioning treatment or if your horses coat/skin is looking a bit dry or dull or if you want to get your horses coat really healthy and shiny before a show I do the same as I described for the Deep Conditioning Treatment except I use a lot less oil. Generally 30-50ml is about right.
Before/After/Instead Washing
The HSE Hot Oil is also great at helping to lift the dirt from the skin and hair and bringing it to the surface. I try not to shampoo my horse too often as it can strip the natural oils from the coat.
Dilute about 125ml/half cup of oil with 5-6L of water and sponge on. Leave the coat to start to dry then get the horse moving for 5mins to warm up the skin and soon enough you’ll start to see the dirt coming up and sitting on the surface of the hair.
When I don’t want to shampoo I just hose off the horse and I find that this method does a great job at cleaning the hair and skin without the need for shampoo.
If I am also shampooing then this is a great way to get the dirt up to the surface of the coat, making it faster and easier to wash.
Use it after washing to give the coat a lovely deep gloss. For clipped coats I use 125-250ml of oil 5-6L of water. For longer coats I’d use only a capful to oil to help lay the coat flat and stop that fluffy look.
Everyday Grooming Spray
This is my favourite ways to use the HSE Hot Oil and how I use it 99% of the time. Just put a couple of capfuls of the hot oil in a spray bottle and then top it up with water. Before you use it just give it a shake to mix the oil and water, it will turn a milky white colour.
I love the NTR Super Sprayers which were sourced especially for this job – being a high volume sprayer you don’t need to squeeze the trigger as many times to apply the product to your horses coat and its a 1L bottle so you don’t need to top it up as often. I like to use 50-100ml of Hot Oil, I find that this is a good general mix for most coat types. If my horse has recently been clipped or if the hair & skin is feeling a bit dry then I’ll make it a bit stronger.
This is great as an everyday grooming spray, just spray on and give your horse a brush or use your hands to rub it into the coat & skin. The natural moisturising ingredients in the hot oil feed the skin & hair, and replace the horses natural coat oils that are lost from rugging, washing, sweat etc.
Manes and Tails
I love to use the same mix as for the everyday grooming spray in manes and tails as a detangler that also conditions, moisturises and strengthens the hair without coating the hair in silicon (which aside from not being great for hair, it also locks in dirt making it hard to get clean).
If your horses tail is quite dry you can make up a mix of 50:50 hot oil with water and either put it in a bucket and dunk the tail in it, or put it in a spray bottle and spray on, there is no need to rinse it off.
I’ve found that it is also great for helping to get rid of dandruff and encouraging new hair growth too.
Top Tip #2
If you ever have problems with rub marks on shoulders (or elsewhere) then this is a great help. If the rub marks are already there then it will help stop them getting worse and also help to grow back the hair (though the HSE SupaV was designed specifically for coat hair growth and is even better than the Hot Oil). Just spray the shoulders liberally before rugging.
Makeup For Show Day
HSE Hot Oil treatment is so versatile that you can use it as a makeup as well. I’m sure many of you have used makeup products that either immediately stain everything they touch or are difficult and messy to apply, especially for people who don’t do it regularly.
Depending on your horses natural colouring and the look you’re after you can either use it by itself or with chalk as well. It melts into the skin though the hair to highlight the eyes, muzzle, knees, hocks etc. Some products just sit on top of the skin and after a little while you get that horrible beading look with the yucky little balls that seem to sit on the skin.
If you’d like a darker look just apply a little oil to the area you wish to highlight, rub the chalk on quite liberally and then apply more oil over the top. I like to put the oil on a cloth so I can blend the chalk and distribute the oil properly.
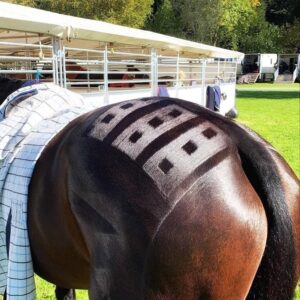 Don’t you just love a gorgeous horse butt that’s been perfectly enhanced with perfect quarter marks and sharks teeth? I know we do!
Some of the most common show prep questions asked are about sharks teeth and quarter marks so we thought we'd share some tips and tricks to greatness.
QM’s & ST are used to enhance the conformation of a well muscled hind quarter and to draw attention to the cleanliness and shine of a well conditioned show horse. They are created by brushing the hair in different directions with brushes and combs.
The first step to getting a fab result with your QM’s and ST’s is to have the right length coat. Too short (i.e. clipped) and they really don’t work, too long (winter coat) or a shedding coat and they just draw attention to the fact that your horse doesn’t have a show coat (and it’s hard to make them look really neat when they’re shedding).
A nice short summer coat is what you need. You also need to make sure that your horse is super clean.
The next step is to dampen the coat. You can do that with just about anything (water, coat shine etc). Our favourite way to do it is with the Hot Oil Coat Conditioner mixed as a grooming spray because not only does it dampen the coat perfectly but it ads a gorgeous shine as well plus it’s actually good for the skin & hair. Dampen the coat really well and brush all of the hair horizontally back towards the end of the horse. To finish use HSE Q-Set to set your masterpiece in place all day.
Our next tip is to have the right tools, a must have in the kit has to be the NTR Ultimate Marker Comb - featuring 4 different sized metal teeth combs there is plenty of choice, the possibilities are endless!
Another common question is “what style of QM’s and ST should I do on my horse?” Basically the general rule is checkers and more elaborate patterns for show horse classes and bars and more basic patterns for show hunter classes.
However it’s the nuances within those suggested patterns that can really make the difference to the overall look.
The whole point of QM’s and ST’s is to enhance your horses hind quarters. To do this you need to step back and be really objective about your horses confirmation and muscling. Does your horse have the perfect hind quarters? (don’t worry, very few actually do!).
Is your horses bum a bit slopey?
Or is it a bit flat?
Is it a bit short in the hip?
Or a bit long?
It’s the answers to these questions that will help you work out which markers suit your horse best.
If your horses behind is a bit slopey, then rather than following the lie of their hair (which slopes down towards the tail), do your checkers and bars so that their horizontal lines are parallel with the ground. That way it will give the illusion to a more level and muscles hind quarter.
If your horse is a bit flat then follow a line that is more sloped to give the illusion of more angle.
It’s the same idea with sharks teeth. They usually start down the line from the point of hip and where the flank ends. If your horse is a bit long in the hip then doing fewer but larger/fatter sharks teeth and/or starting them slightly further towards the hind quarter (rather than right on that change of hair at the end of the flank) will help to give the illusion that they’re not as long.
If your horse is a bit short in the hip then doing smaller and skinnier ST’s that start nice and close to that change of hair will help to elongate the hind quarter.
If you’ve done all of this and you’re still not sure on the best look for your horse I recommend doing 2 different patterns at a time (1 on each side) and then photograph and lunge your horse. Standing still near you vs moving a bit away from you gives a very different look and it’s likely that you may change your mind once they’re moving. Then do a few more patterns and repeat. We find this a really easy way to decide what look suits a horse.
There’s so many different options. Check out NTR's video here to take the discussion to another level, and let you delve into Beths thoughts of how she decides what suits each horse, as well as showing you just a few different types and styles of checkers to get your creative juices flowing.
 Getting our horses clean is often a necessary part of owning them but the downside of shampooing is the way that it strips the natural oils from the skin and coat.
Sebum is vital for the health of our horses. It provides a protective “armor” for them against toxins, dehydration, and environmental and mechanical stress, including temperature. While the hair and skin protect the animal, the sebum layer protects the skin and hair. The sebum layer is made up of fatty acids and oils that coat and protect the skin and hair.
When humans wash, our body produces more sebum and our skin will back to it’s natural levels in about 3 hours.
When we wash our horses it takes them 17-21 DAYS to reproduce their sebum and get it back to their normal levels!!! So if you’re washing your horse every week or two then they’re never getting those sebum levels back to where they should be, and it really doesn’t matter what claims the shampoo makes, doesn’t matter what fancy ingredients/essential oils/vitamins etc it has in it. For it to clean the skin and hair it will remove the dirt and oils including the sebum.
But there is another way!
Use the HSE Hot Oil Coat Conditioner mixed with water as a grooming spray. Simply spray the coat to dampen with the hot oil mixture, brush in with a firm brush and let the magic happen!
It will lift the dirt from the skin and hair and leave it on the surface of the coat.
If you want to speed up the process you can do this process and then work your horse, the movement and warmth created from the work will help to lift the dirt up faster. Otherwise pop your horse back in the paddock/stable for a while, rug or not is totally up to you.
The beauty of this method is that not only are you removing dirt from your horses skin without stripping it with shampoo, but you’re actually ADDING good oils to the skin and hair that will moisturise the skin and condition the hair. Once the dirt is on top you can remove it by hosing, or brushing, or a damp towel etc (depending on your facilities and the time of year/weather).
Not all hot oils are made equal…
There are many oils out there that people use on their horses coat. Some products contain mineral oils – which isn’t necessarily a bad thing – it just comes down to what you’re wanting to achieve. Mineral oils are used on people all the time as a barrier oil. They will sit on top of the skin and create a barrier against the environment. There is nothing wrong with this and they’re often very gentle.
Check out Beth from Nags to Riches Equestrian demonstration here
HOWEVER, the reason they sit on top is that they have a molecular size that is too big for them to be absorbed by the skin and the hair.
So if you’re wanting a hot oil treatment that can be absorbed by the skin and the hair so it will moisturise and condition, you need it to have ingredients that all have a molecular size small enough. This is exactly why the HSE Hot Oil Coat Conditioner was developed to be what it is.
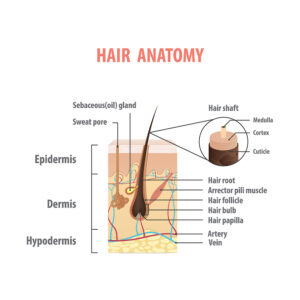 One of the most common horsey questions we see on social media is “how do I get my horses tail clean?”
There’s heaps of different methods and products however what I’ve found is that it’s not until I’ve truly learnt and understood the hair shaft, the ph levels of a healthy horse and how different products and cleaning methods and their ph levels affect the hair that I’ve had great success with getting hair clean.
To address this, the team at HSE & NTR delved into the intricacies of hair structure and its response to various products.
The outer layer of a strand of hair is covered in things called cuticles that, when looked at under a microscope, look a bit like lots of fish scales. Dirt and stains gets into the hair shaft so we need to open up those cuticles to get the dirt and stains out.
A healthy horse has a pH level of 7-7.4 (which is different to humans, we are 6.4-6.9). pH balances measure acidity or alkalinity on a range from 0, very acidic, to 14, very alkaline, with 7 as a neutral midpoint.
Alkaline products open up the cuticle and penetrate the cortex of the hair though they can leave the hair dry and prone to breakage. Mildly acidic solutions do the opposite, they flatten the cuticle, making hair shinier and easier to brush.
Stains are trapped within the hair shaft so the first thing that you need to do is to open the cuticles so that you can remove the stains.
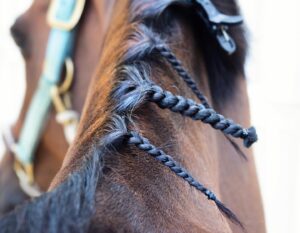 A beautifully plaited mane enhances a horses neck and shows off well developed muscles. Carefully sculpted plaits can be used to create illusions too, including making the horse look like it has more topline or hide a cresty neck.
Thin or rubbed out manes are a frustration for many of us, which is why NTR Plait Booster was created.
In this video Beth from NTR will show you how to put in false hair to boost your plaits.
Adding in the NTR Plait Booster is a great way to achieve fuller plaits. You can choose how much hair to add in, allowing you to easily customise how much hair each plait needs.
Available in 8 different colours:
- Black
- Dark Brown
- Dark Chestnut
- Bright Chestnut
- Dark Grey
- Light Grey
- Cream
- White
If in doubt we recommend that you choose a shade that is slightly darker than your horses natural mane colour. Darker colours will stand out less and be less obvious that synthetic hair has been added.
70g each (approximately 30m). That’s enough to boost up to 90 plaits!!
Each roll comes in a resealable bag for storage.
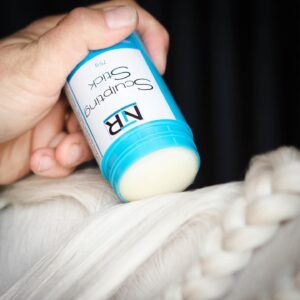 A beautifully plaited mane is a huge part of presenting your horse and a poorly plaited mane really impacts the overall look.
Plaiting our horses for a show or competition is an enjoyable task for some, but for others it’s the thing that nightmares can be made of. Beth from NTR has been plaiting horses for many many years (and my friends and dolls since she was a little girl) and she has been teaching people how to plait for over 10 years now too.
So check out her video here on how to plait and sew in rosettes in a horses mane. Hopefully it helps you a bit and you pick up some tips to improve your plaiting or even give you the confidence to try it yourself.
Incase you’re interested, the products used in the video are:
You can also purchase them as a combo
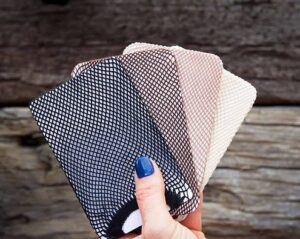 The last thinganyone wants to worry about on the morning of a competition is getting your own (or your childs) hair right. Bobby pins, and hair spray and if you’re trying to do a childs hair, you know that they usually hate it even more! They’re uncomfortable once you put a helmet on and unless you use enough spray to put another hole in the ozone layer you know that you’re going to end up with flyaways at some point anyway.
This is honestly the BEST way to do hair for a riding competition. It’s quick, easy, classy & neat. You don’t need hair spray or bobby pins and a well styles bun will never go out of fashion.
The NTR Hairlock hairnet is every riders dream!
Check out how easy it is to use here.
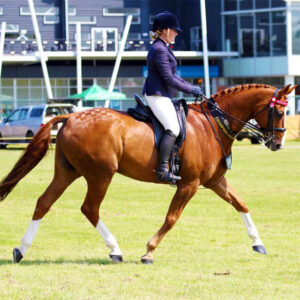 White socks draw your attention. And blindingly white socks are a fabulous way of catching the eye and also tipping your presentation to that next level.
You can watch here from start too finish. With the right methods and products, achieving gorgeous socks and stockings is easy..
We offer two quality whitening products which are both packed full of natural ingredients:
HSE Beyond White - a premium UV protection & moisturising product
OR
NTR Pure White - a water & rub resistant hybrid cream gel
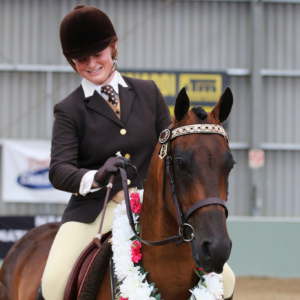 In show horse classes, where it is permitted, it is common to apply makeup to our horses eyes to enhance them.
In this video Beth from NTR will show you how to apply makeup and what to take into consideration when doing it. Beth is using the HSE Smudge Pot makeup in Hunter Brown. It also comes in Black Suede.
This makeup is especially designed for horses – their skin & hair. It is very safe and gentle.
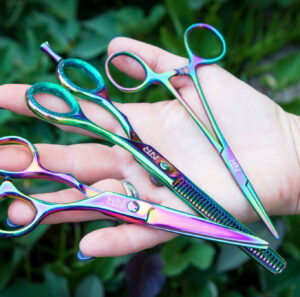 Mane with thinning scissors rather than pulling it is a great method if you don’t like to pull horses mane or if you have a horse that doesn’t like it’s mane being pulled.
Personally, I love this method – it’s quick, it’s easy, it’s painless for both horse and human.
No matter whether you use scissors or pull to thin a mane, the hair is going to grow back. It’s a bit like waxing or shaving for us – but the difference is that with a horses mane, it’s not the first bit of regrowth that’s the problem. The regrowth of the hair from being a couple of centimetres long, to the full length of the mane is when it’s a problem if you’re plaiting. And whether you pull or cut like this you’ll still have the same issue.
Many of us, at times, need to shorten a mane but we don’t want to thin it. This means that pulling isn’t an option so we need to cut it instead.
There’s loads of different ways of achieving similar results. Some people like to use razors, others use old shearing blades or various tools but I simply use a pair of scissors.
Click here to view how to thin a mane using our NTR Thinning Scissors or for those of you just wanting to check out how to trim a mane using the NTR Trimming Scissors click here.
